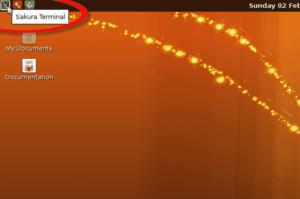
You have two options, run live or hardware install The Live option will allow you to try and use Babbo-Daddo on any PC / Laptop without affecting anything that is already on it. Nothing is written to or saved to the computers hard drive at any time. This is a great way to let your kids play and learn on your own PC / laptop without worrying about them breaking your windows or Linux installations. You will need: A USB flash drive of 512MB or larger or a Blank CD/DVD disk to make the “Live” version The hardware install is for when you want to put Babbo-Daddo on a PC / laptop permanently, this option installs the the computers hard drive and will replace / overwrite anything that is already installed. You will need: A PC / laptop with at least 256MB of RAM and a 1gB Hard Drive Definition: An ISO file, often called an ISO image is an “image” of an entire CD, DVD, or BD. The entire contents of a disc can be perfectly represented in a single ISO file. Once we’ve created the operating system on our test hardware and are happy that it all works as we’d like we create an ISO image of it. This image is then uploaded to the server and made available for download. See the FAQ on how to convert an ISO to CD-ROM if you are unsure what to do with an ISO image. Download the ISO that you want to use and burn it to CD using your favorite CD / ISO software. Windows users can try: ImageBurn, CDBurnerXP Create the Live CD Create the Live USB Firstly, please download YUMI and save it to your desktop. Alternatively, visit http://www.pendrivelinux.com/ and download directly from the author’s website. Insert the USB drive that you want to use, this must be at least 256MB and will be formatted! launch YUMI Click on the drop-down arrow to choose your USB drive Boot your PC / Laptop and choose boot from CD/DVD There is usually a boot menu that you can choose from when the device starts up, this is different on every device and you may need to check with your user guide or motherboard manual. (Often the boot menu is obtained with F8 – F12) Alternatively you can set the boot order in the systems BIOS / CMOS, this is often accessed by pressing DEL, F1 or F2 as soon as the system starts up. Once you’ve booted of CD Babbo-Daddo will load automatically and you should end up at the Tux desktop ready to play the kids games / software. Hardware Install – Download the ISO image of SliTaz 4.0 from the ISO Downloads section on this website. – Download the ISO image of Babbo-Daddo from the ISO Downloads section on this website. – Choose your desired language and keyboard layout when prompted. – Close PCMan File Manager – Right click just to the right of where you selected ISO file and choose paste – Scroll down the page to “Grub” and tick “Install Grub bootloader.” – The installation shouldn’t take more than a minute or two, when finished you will be prompted to restart, you may have to scroll down the page to see this. Either load GParted from the tazpanel installer or from Applications, System Tools On the top right of GParted ensure that your hard drive is listed and selected. There are several scenarios depending on wether your drive is blank, data wiped or has had a previous operating syyetem installed upon it. Basically, i’d advise that you right click on any visible partitions shown in the bottom window of GParted and individually delete them. Now, right click on the grey bar that should be showing as unallocated along with the size of your hard drive. You’ll need to apply the changes to the hard drive by clicking on Apply from the toolbar, this may take a minute or two depending on the size of the drive and speed of your device. Finally, click on close when it’s finished and once again right click on the middle bar, which should now say /dev/hda1 or /dev/sda1 Select Manage Flags and tick the “boot” option. Close the box and indeed GParted, you’re done! Proceed with your installtion – You need to have SliTaz 4.0 installed to your hard drive. – You will also need to download the Babbo-Daddo package archive from this website. NB: Currently the update script needs to be located in the /packages directory on a USB drive named MULTIBOOT Boot up your PC / Laptop that has SliTaz 4.0 installed and then: Open the file manager and click on your USB drive to mount the device. Open the terminal and type: cd /media/MULTIBOOT/packages/ Now Type: ./run.sh Sit back while all the files are copied over, when finished, remove the USB drive and reboot. You boot up as usual and go to log off / shut down. Choose close session At the logon prompt delete the username Tux and replace it with: root The default password is: root You will now be logged into the root / admin account, from here you can configure network / wifi access, add hardware, add packaged and make any changes that you want to. Don’t be afraid to try anything you want, if it does go horribly wring just re-install from the ISO and start again! Close Tux’s session and login as root. Username: root, Password: root Click on the terminal icon in the top left of the screen Occasionally babbo-daddo fails to load up and hangs at this stage. try removing any USB / CD media and reboot. More often than not the system loads as normal on next restart. Occasionally babbo-daddo fails to load up and hangs at this stage. try removing any USB / CD media and reboot. More often than not the system loads as normal on next restart.
Linux users can try: Brasero, K3b
– First, download the ISO image of Babbo-Daddo from the ISO Downloads section on this website.
– Burn the ISO to a blank CD / DVD.
– Boot your PC or laptop from CD / DVD and it will automatically load into Babbo-Daddo.
(It may take a minute or two but you don’t need to press or touch anything!)
– When the kids have finished playing / learning simply switch off the PC or laptop and remove the CD / DVD.
– Reboot your PC / laptop amd carry on using Windows / Linux as is nothing happened!
– First, download the ISO image of Babbo-Daddo from the ISO Downloads section on this website.
– Create the bootable USB drive using YUMI (An FAQ is available on the site)
– Boot your PC or laptop from your USB Flash drive and it will automatically load into Babbo-Daddo.
(It may take a minute or two but you don’t need to press or touch anything!)
– When they are finished simply switch off the PC or laptop and remove the USB flash drive.
– Reboot your PC / laptop amd carry on using Windows / Linux as is nothing happened!
(Double-check if you are unsure as the drive you select will be formatted)
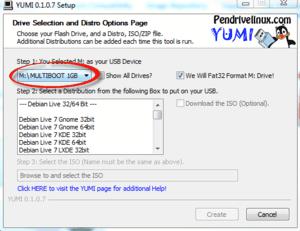
Click the box that says “We WILL Fat32 Format….”
Then, scroll down the list of software until you find the entry for SliTaz (Another Tiny Distro)
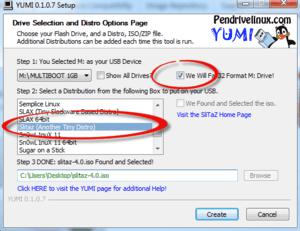
Click on “Browse” & find the SliTaz-4.0.iso file that you have downloaded
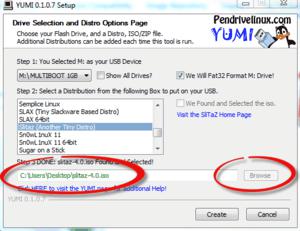
That’s it! Now, click on “Create”, after a minute or so you should see the following screen.
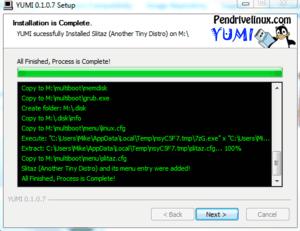
Choose next, and on the final window just click Finish.
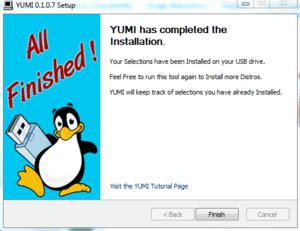
Your USB drive is now ready! Remove it and continue with your SliTaz / Babbo-Daddo installation.
* This will install Babbo-Daddo on a hard drive and will overwrite anything already on the PC / Laptop
You will need: A USB Flash drive of 512MB or greater
– Make a bootable USB drive using YUMI (Read the FAQ How to use YUMI to make a USB Live CD)
– Copy the downloaded babbo-daddo ISO file to the root of your USB flash drive.
– Boot your PC or laptop from USB and it will load into Slitaz 4.0
(It may take a minute or two but you don’t need to press or touch anything!)
– Left click on the little spanner icon from the top left menu.
– When prompted re-type the username and password, both “root”, then click OK
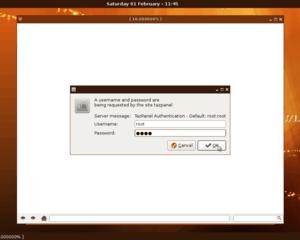
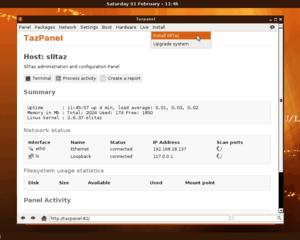
– From the new Tazpanel window, high-lite over Install from the toolbar and choose Install SliTaz
– Choose continue Installation from the bottom of the page.
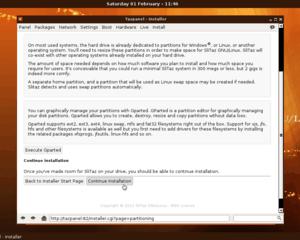
– Select ISO File
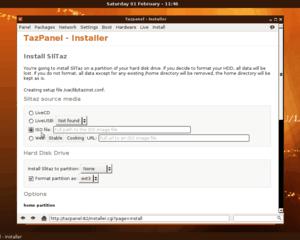
– On the bottom left of the desktop, click on Applications, System Tools & launch PCMan File Manager
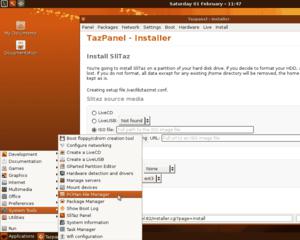
– Click on your USB Drive in the left hand tab, it is probably called MULTIBOOT
– You should see your babbo-daddo.iso file listed on the right side of the window, if so, highlight the text in the address bar and click copy
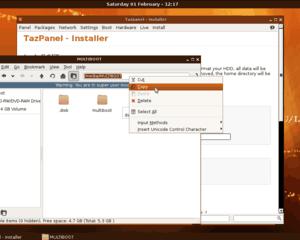
(This is to get the correct path to your babbo-daddo iso file)
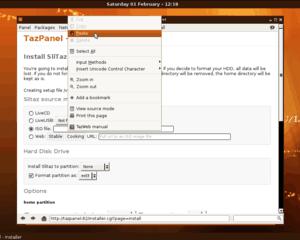
Now add the name of the downloaded iso file
eg. /media/MULTIBOOT/babbo-daddo_v1.0a.iso
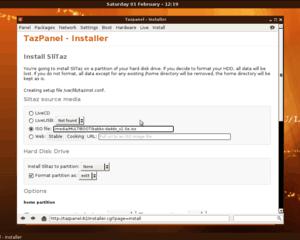
– Install Slitaz to partition should be selected as /dev/hda1 or /dev/sda1
– Tick “Format partition as” and select “ext3”
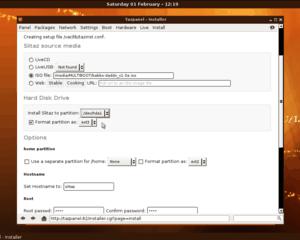
(If no hard drive is available you will have to scroll down the page and click on “Back to Partitioning” then choose “Execute GParted” you can continue the install once you have prepared your hard drive. There is an FAQ on the site covering using GParted)
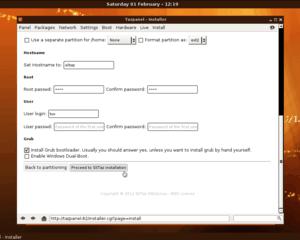
– Click “Proceed to Slitaz installation.
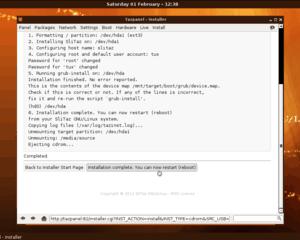
– Remove the “Live” USB and click on restart.
– That’s it, you’ve installed Babbo-Daddo!
(If you have multiple hard drives and or USB drives attached double check that the one that you want to install Babbo-Daddo on is the one that is shown)
Then, from the toolbar choose Device, Create Partition Table and click Apply
Choose, New and then just click on +Add
(Follow the Babbo-Daddo hard drive installation FAQ, substituting the Babbo-Daddo.iso file with the Slitaz-4.0.iso file)
(Once downloaded, extract the contents and copy the uncompressed “package” directory to a USB drive named MULTIBOOT)
1) log into Tux’s account. (This step is necessary to create all the config folders)
2) Close the session and now login as root
3) Click on Applications, Preferences, Desktop Wallpaper & “tick” Manage the Desktop and show icon files.
Hit Enter / Return
Hit Enter / Return
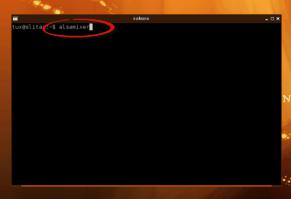
type the following command and hit enter, alsamixer
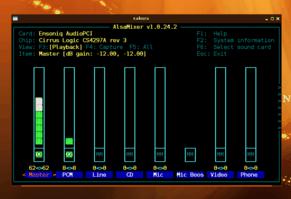
Once Alsamixer is loaded you use the LEFT and RIGHT arrow keys to choose different options such as Main Speaker, headphones, MIC, etc. You then use the UP and DOWN arrow keys to increase or decrease volume as necessary.
Press ESC when finished and recheck if sound is enabled?
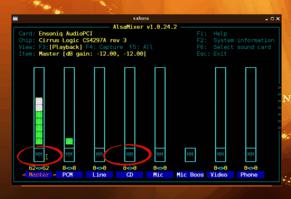
Sometimes, the PC or Laptop hardware may have been muted during the install process. This is made apparent by the “MM” as shown below. To take the relevent input / output out of mute simply press the “m” key on your keyboard and then use the arrow keys to set the correct volume. Press ESC when finished and recheck if you have audio?
F.A.Q.
